This is a second article of the series of posts called “3 steps to setting up a successful LinkedIn ad campaign” and will cover a step-by-step guide of how to create a LinkedIn Ad campaign. If you’ve not seen the previous blog post about all different LinkedIn ad types, you can read it here.
**Read the below only if you don’t have a LinkedIn Campaign Manager set up**
Your LinkedIn Ad campaigns will be managed on a different platform than the LinkedIn page you see every day – this is called LinkedIn Marketing Solutions platform. Visit this page to get started and select “Create Ad”. From there, you’ll be asked to create a LinkedIn Campaign Manager account if you haven’t got one already. Campaign Manager is the tool that allows you to create accounts, run LinkedIn ad campaigns, manage campaigns and find reports with information about the performance of your campaigns.
Once your Campaign Manager account has been created, you’ll be taken to your member dashboard page where you can start setting up your first LinkedIn Ad campaign.
1. Set Up Campaign
Choose the campaign objective
The objective is what action you want people to take when they see your ad. There are three main campaign themes: Awareness, Consideration, and Conversions. Under those themes, there are 7 available objective options detailed below.
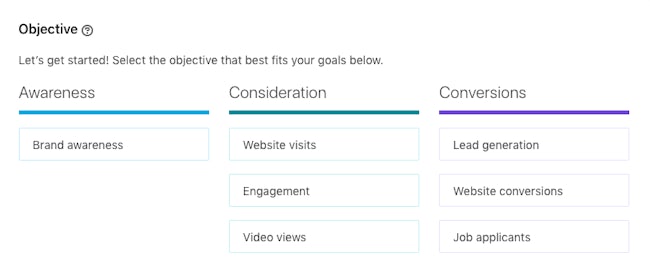
Select one objective that best fits the goal of your business:
- Brand awareness – to spread awareness of your product or service
- Website visits – to drive more traffic to your website or landing page
- Engagement – to increase social engagement on your Page or increase your followers
- Video views – to share your video with a larger audience
- Lead generation – to capture more leads on LinkedIn
- Website conversions – to capture more leads on your website or drive actions which are valuable to your business
- Job applicants – to drive more applications to your job opportunity
Set up audience targeting
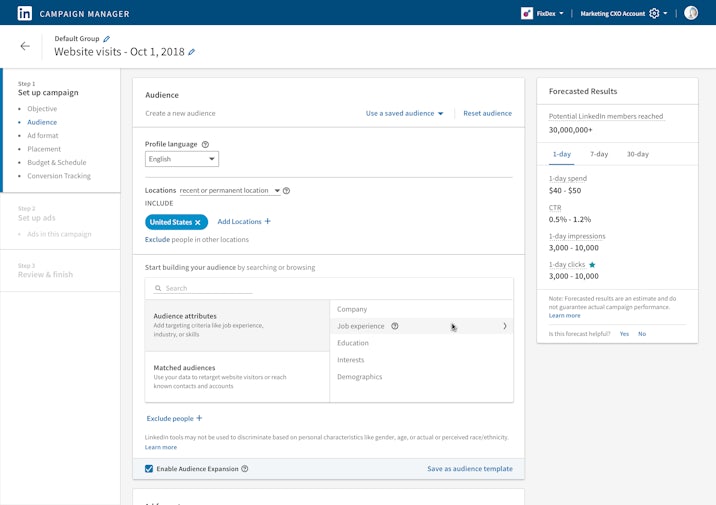
The next step is to set up an audience targeting for your campaign. This is a very important step, because the more specific and relevant audience you target, the better results you can get. You can either create a new audience, choose a saved one that you have set up previously or select one of the suggested audiences by LinkedIn.
If you decide to create a new audience, you will be prompted to select a location where you want people to see your ads, profile language in which your ad will appear, and also relevant audience attributes which include: company, demographics, education, job experience, interests and traits. You can use “or” option to broaden your audience, or “and” option to narrow down your audience. There is also an option to exclude audiences that are not relevant to you. Remember to enable audience expansion just before you save your audience to show ads to LinkedIn audiences with similar attributes.
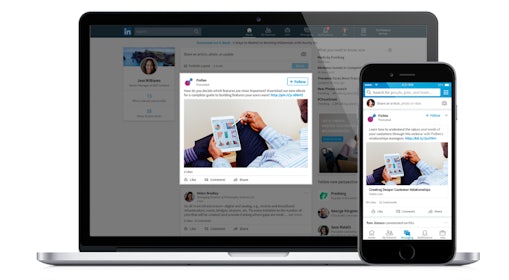
Choose the right ad format
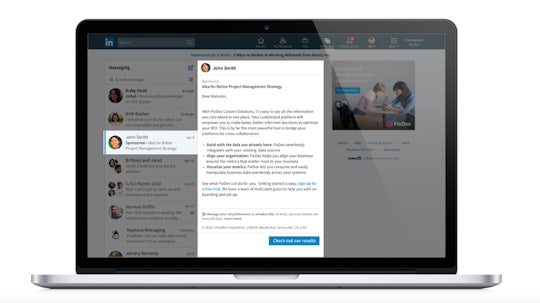
After you’ve built your audience, you will be asked to select an ad format for your campaign. You will see different options available depending on the objective you chose. Your options will include: Sponsored Content ad (single image, carousel, video ads), Message Ads (that show up in LinkedIn message inbox), Text Ads (right rail and top banner ads) or Dynamic Ads (follower, spotlight and content ads). Additionally, some ad types will require you to link your LinkedIn Company Page in order to run the campaign.

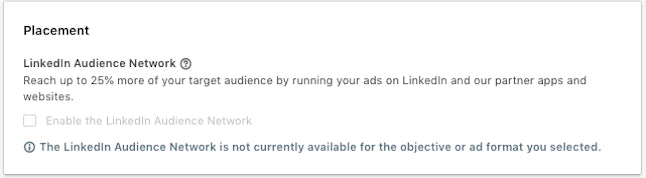
Placement
With placement option, you can decide whether you want your ads to be shown on the LinkedIn Audience Network which is LinkedIn’s third-party platforms and sites. According to LinkedIn, you can reach up to 25% more of your target audience by running your ads on LinkedIn as well as it’s partner apps and websites.
Note that this option isn’t available for every ad type and objective.
Set up budget and campaign schedule
After choosing your placement, the next step is to set up a campaign budget which will help you control the costs and validate your marketing strategy. You can choose to set a daily budget, or both a daily budget and total budget.
In terms of the ad schedule, you’ll have the option to only choose start date and run your campaign continuously or to choose both start date and end date if you have a restricted time to run your campaign.
The last process of this step is to select a bid type for your campaign objective. There are three options you’ll be shown:
- Automated bid – lets LinkedIn’s system bid to get more leads for your budget
- Enhanced CPC – you can adjust the CPC (cost per click) bid manually
- Maximum CPC – you can adjust the CPM (cost per 1,000 impressions) bid manually. Keep in mind that this option is unavailable if you’re using the LinkedIn Audience Network option
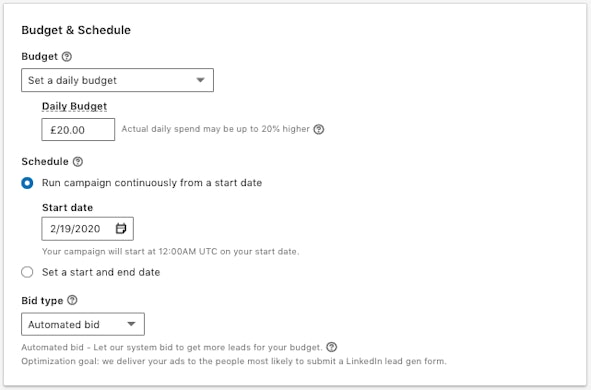
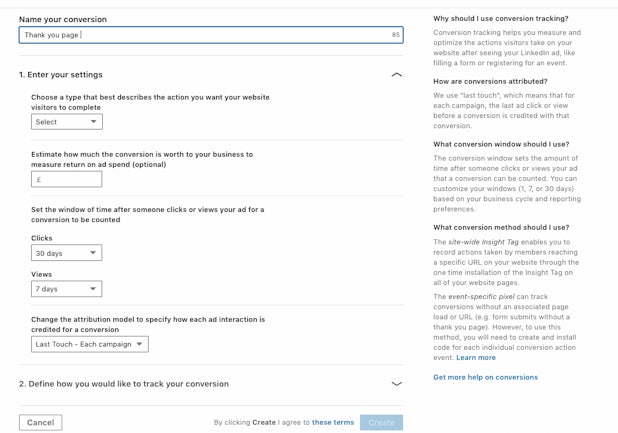
Set up conversion tracking
Even though setting up a conversion tracking is optional, it is highly recommended as it allows you to measure actions taken by your target audiences and helps you understand the performance of each campaign and individual ads.
If you choose to set up a conversion tracking, simply click on “Add conversions” where you will be prompted to name your conversion, choose the conversion settings and define how you would like to track your conversion (you can do it using site-wide Insight Tag or an event-specific pixel).
If you find this process too complicated, I recommend reading this article which explains setting up conversion tracking on LinkedIn in more detail.
Congrats! You’ve just set up your LinkedIn Ad campaign! The next step (and almost last) will be setting up your ad, but before you click the “Save” button make sure that you’re happy with your objective and ad format as it cannot be changed once you’ve saved it.
2. Set Up Ads
Once your campaign has been set up, you can now start creating your ad. This is more of a fun part of the process as it allows you to be more creative. To get started, click “Create new ad”. Depending on which ad format you chose, you’ll need to provide a few key things to complete your ad. This will usually include the below (note that these do not apply to Message Ads):
- Ad image/video
- Ad headline
- Ad description
- Destination URL
Once you input this information, you will be able to see a preview of your ad on the right-hand side. If you’re happy with your ad click “Create” and you will be redirected to the previous screen in Campaign Manager where you can create more ads for your campaign.
Here are a few tips for each of LinkedIn’s ad types:
Sponsored Content tips:
- Make sure that the ad headline is under 150 characters
- Keep the ad copy under 70 characters
- Use larger images rather than standard thumbnails (recommended ad size is 1200 x 627 pixels)
- Include a clear CTA
Text Ads tips:
- Although an image is optional, including it can drive better results
- Ad image should be 100 x 100 pixels, uploaded as JPG or PNG and 2MB or smaller
- Write a headline under 25 characters & description under 75 characters
- Grab attention with eye-catching headlines, for example: “Are You a Finance Director?” or “Attn: Finance Managers”
- Use a strong and clear CTA like “Register Now” or “Contact Us Today!”
Message Ads tips:
- Message Subject should be up to 60 characters & message text up to 1,500 characters
- Keep your message relatively short – according to LinkedIn, the body text under 500 characters has a 46% higher CTR
- Add macros such as First name to personalize your message and make it more relevant to the recipient
- Make it interactive by adding hyperlinks
- Include a clear and friendly CTA with 1-3 words length
- Banner creative should be 300 x 250, JPG, GIF (non-animated), or PNG
3. Review & Launch
Before your ads will go live, LinkedIn will review them first to ensure they meet the platform’s standards. This usually takes about 24 hours. You can check the status column in Campaign Manager to see whether your ads have been approved or not.
And you’re done! Your LinkedIn Ad Campaign should be now ready to rock. Good luck!
Hopefully reading this article helped you understand how you can create an effective LinkedIn ad campaign. The next and the last article from “3 steps to setting up a successful LinkedIn ad campaign” series will cover measuring and optimising the performance of your LinkedIn Ads.
If you need help with setting up the LinkedIn Ad Campaign, or you would like to discuss any other aspect of your digital strategy with our team, get in touch today.


