
Tackling the technical set up to track and measure campaigns in Search Ads or Display & Video 360 via Floodlight tags can be a a daunting process, especially if you’re new to these Google Marketing Platform (formerly known as DoubleClick) advertising platforms.
If you’re not sure what Floodlight is, it’s a system used by Search Ads 360, Display & Video 360 and Campaign Manager to track and report on conversions. A Floodlight activity is a specific conversion you want to track, such as the completion of a purchase or a visit to a page on your site.
To most of us advertisers it’s an entirely new conversion tracking system to wrap your head around. But when broken down into simple steps, setting up Floodlight activities and audiences in Campaign Manager needn’t give you a headache. In this guide, we’ll run through how to:
- Set up new Floodlight activities in Campaign Manager
- Import Floodlight activities to Google Tag Manager
- Create audiences in Campaign Manager
As a prerequisite to this guide, you’ll need to have both of the following set up:
– An active Advertiser profile set up in Campaign Manager
– A Google Tag Manager account, with the code correctly installed on your site. This excellent beginner’s guide to Tag Manager by HubSpot walks you through the set-up process, so definitely check that out if you’re not sure how to get started
1 ) Set up new Floodlight activities in Campaign Manager
In Campaign Manager, navigate to the ‘Advertisers’ tab and select the advertiser you’d like to set up a Floodlight activity for.
Once you’re in the desired advertiser account, navigate to the ‘Floodlight activity groups’ tab and click ‘New’, then give the new activity group a name. For example, if you’re setting up Floodlight activities to track page visitors then give it an appropriate name and choose ‘Counter’ from the ‘Type’ drop-down.
Once you’re happy with the Floodlight activity group, you’re ready to create a Floodlight activity. Select the ‘Floodlight activities’ tab and click ‘New’.
Give your Floodlight activity a name, expected URL & ensure the status is set to ‘Active’. To track page visitors, the settings below for ‘Type’ and ‘Counting method’ will be suitable. You’ll also need to select the relevant activity group you’ve just created from the drop-down.
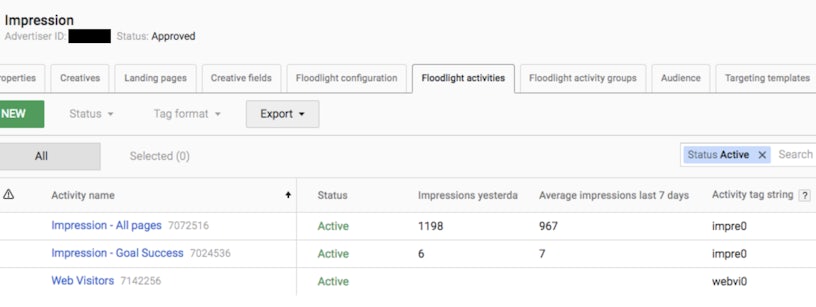
Save this Floodlight activity, then open the Google Tag Manager drop-down which will appear. If you’ve already linked a GTM container it will appear here, but if you’ve not already linked one you can enter the GTM container ID here to do so. Select the container you’d like to push the Floodlight activity to and click ‘Push to Google Tag Manager’, then save to push live. Once the request has been processed it should look like this:

2 ) Import Floodlight activities to Google Tag Manager
Navigate to Google Tag Manager and open up the container the Floodlight activity has just been pushed to. In there, you should see a notification that there is an item pending.

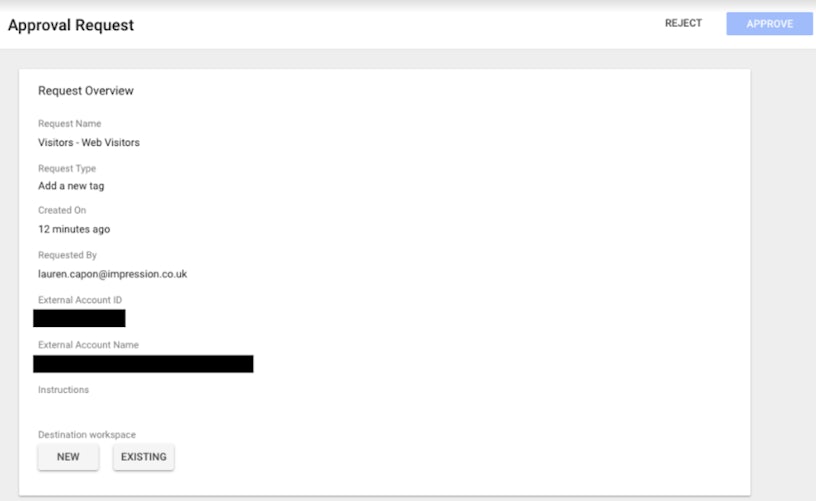
Click ‘View Approval Queue’, select the Floodlight request name, and review the request overview. It’s crucial that when selecting a destination workspace to add the Floodlight activity to, you choose ‘EXISTING’. This will allow you to link the new Floodlight activity with all other tags and triggers in your existing container.
Once the Floodlight activity has been added in Tag Manager as a tag, you’ll need to give it a trigger to make it fire. For an ‘All Website Visitors’ audience, use the ‘All Pages’ trigger.

If you’re looking to track visits to specific web pages, however, you’ll need to create specific firing triggers for these. To do this, create a new trigger, select ‘Page View’ as the Event Type, and specify the Page URL that the desired landing page contains.

Then, assign your new trigger to the relevant Floodlight activity you’ve added.

Similarly, if you’re setting up a Floodlight activity to track conversions you’ll need to ensure the firing trigger is set to the conversion page or event instead of a ‘Page View’. In the case below, conversions are being tracked by a custom site event.

Publish any changes to the GTM container, then navigate back to Campaign Manager.
3 ) Create audiences in Campaign Manager
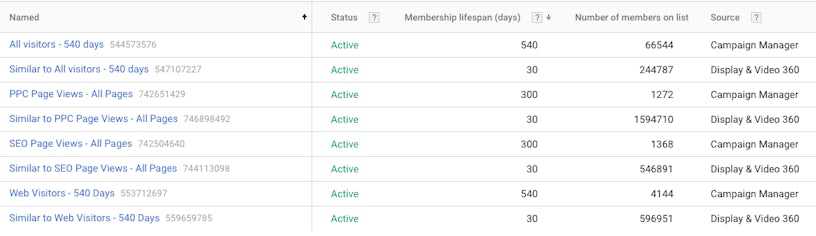
Now your Floodlight activity is published you can use it to create an audience, so navigate to Campaign Manager’s ‘Audience’ tab. Here, you’ll see any audiences you’ve created in Campaign Manager as well as similar audiences that have been generated by campaigns running in SA360 or DV360.
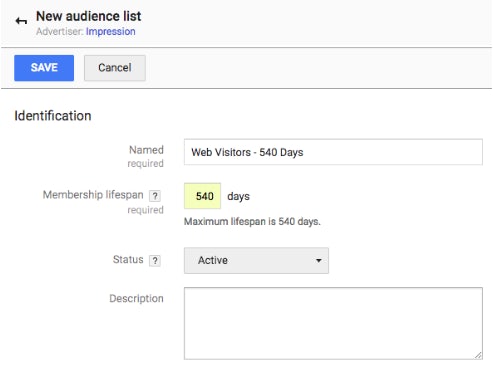
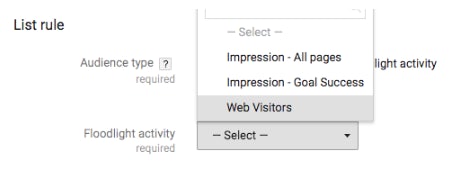
Click ‘New’, give your audience list a name and select a membership lifespan. This will determine the number of days a user will remain a member of the audience before being removed due to inactivity.
Selecting the maximum membership lifespan of 540 will allow you to collect as much data as possible. This will also encourage the creation of similar audiences when campaigns are run in SA360 or DV360. Ensure the status is set to ‘Active’ so that you can begin collecting audience data straight away.
Link the audience with the Floodlight activity you’ve just created, then save the audience.
To ensure that your new audience is tracking properly, check back in around 24 to 48 hours to assess traffic levels. If everything has been set up correctly, the number of members of the audience list will have started to populate.
And that’s it! Your first Floodlight activity and audience are ready to be used to track audiences and conversion activities in campaigns across Search Ads 360 and Display & Video 360.
Want to know how you can leverage the powerful capabilities of Floodlight tracking in campaigns running across the Google Marketing Platform? Get in touch with us here to learn how we can help.


