
As highlighted in a previous blog, the huge shift to working from home we have recently seen is likely to be affecting your analytics data. The effect of this is going to vary considerably depending on the size of your business and the number of internal users accessing your website on a day to day basis. That said, it’s always advisable to exclude known traffic where possible.
This guide contains two variants of the same implementation that can also be used in combination to increase effectiveness. The first variation is specifically designed for WordPress and will automatically detect and filter users after they have logged in. All further visits, logged in or not, will then be filtered from your reports. This solution works well as it doesn’t require any action from your internal site users, however, it shouldn’t be used if customers or the people you want to track, can also log in.
The second solution requires each internal user to follow a unique link that will flag them as internal and filter them and all further visits from your reports. The benefit of this solution is that it can be used on any website, regardless of platform, however, it does require users to take action and follow the “activating” link.
Prerequisites and notes:
- The first WordPress solution will filter ANY user that is logged-in. It is therefore not recommended for WordPress websites that allow customers to log in. An example of this would be an account page for e-commerce websites.
- Both of these solutions use a custom dimension stored in the user-scope of Analytics, this means if the user visits on another device or browser, they will not be filtered unless they log in or follow the activating link again.
How it works!
Both versions of this solution use a custom dimension to filter internal users, the only difference between the two, is how this custom dimension value is set. For WordPress, we look for a cookie that is only set once a user has successfully logged in. These cookies are generally used to customize the admin interface, and often the main site interface on a per-user level. We can these cookies within Tag Manager to set a custom dimension in Google Analytics. This custom dimension can then be used as a traffic filter depending on its value.
For the second variation, instead of using cookies to set the custom dimension, we use the value from a URL query parameter, and that’s it!
How to implement
Follow the steps below, or skip to the videos at the end of this guide!
- Use Google Tag Manager to create a new variable based on your following chosen implementation.
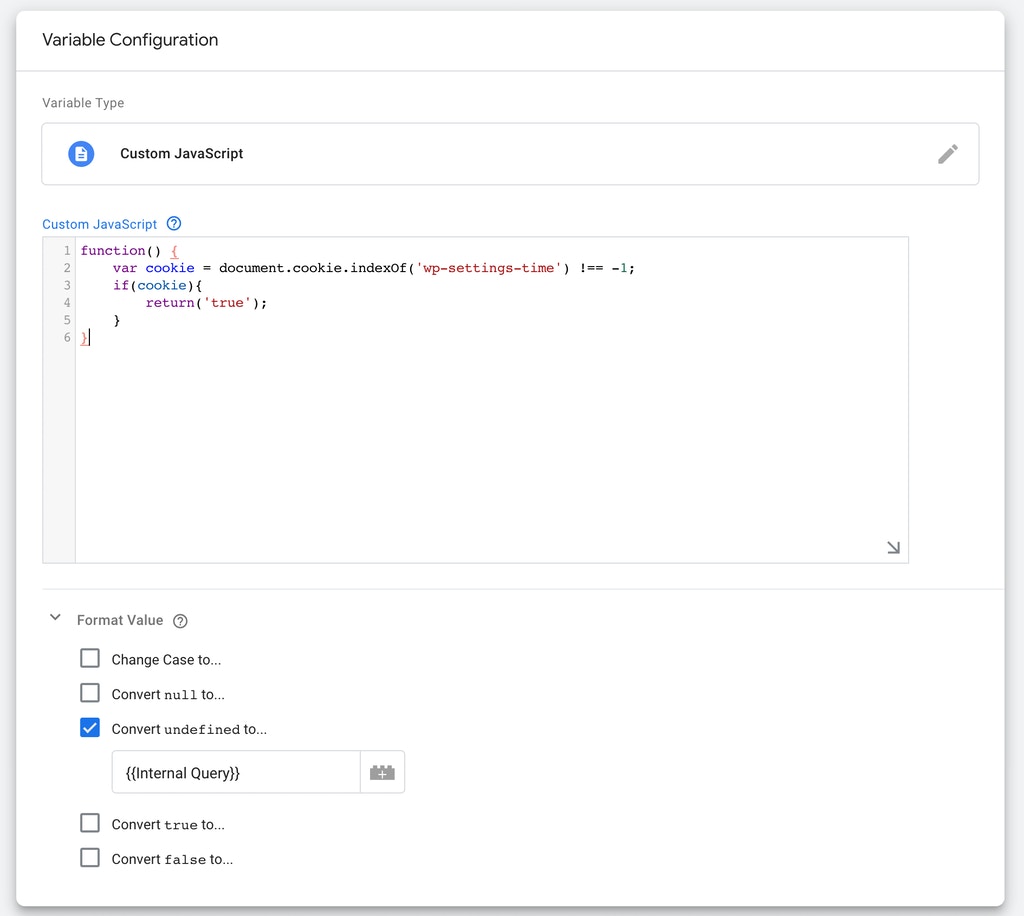
Option A. If you are looking to filter logged-in WordPress users, create a custom JavaScript variable containing the following code.
function() {
    var cookie = document.cookie.indexOf('wp-settings-time') !== -1;
    if(cookie){
        return('true');
    }
}
Option B. If you would like to filter users after they visit a unique “activating” URL, Create a new ‘URL’ variable using the Query option and set the query key to ‘internal’.

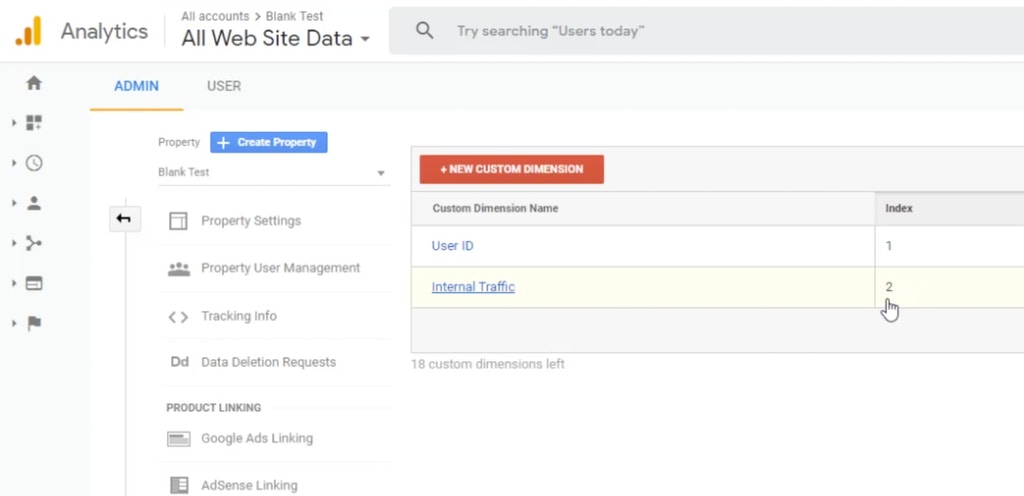
2. In Google Analytics create a new ‘Custom Dimension’ called ‘Internal Traffic’ under the ‘User’ scope.
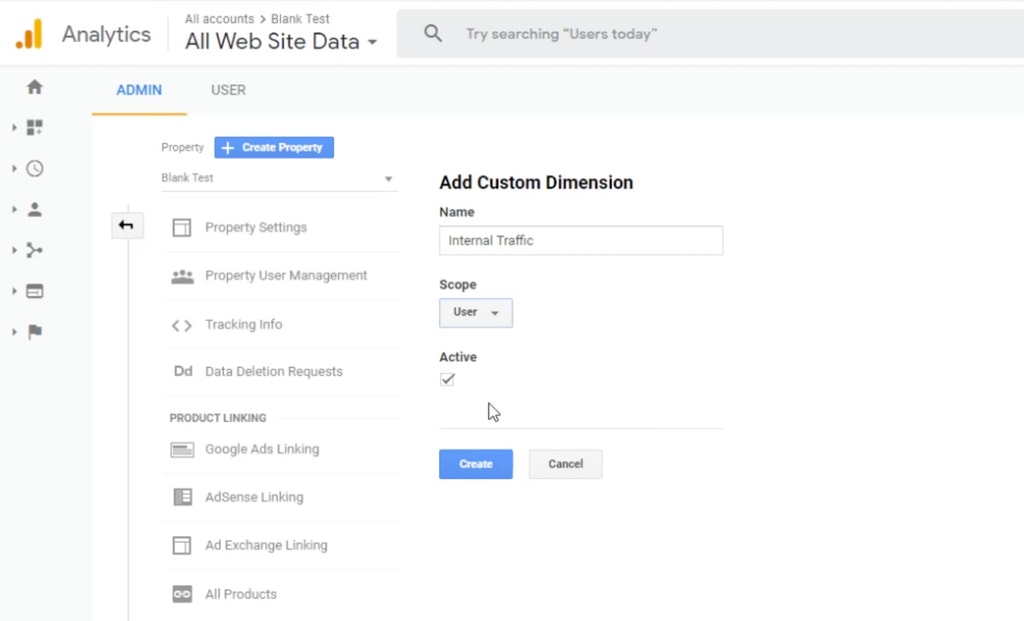
3. Make note of the Index ID.
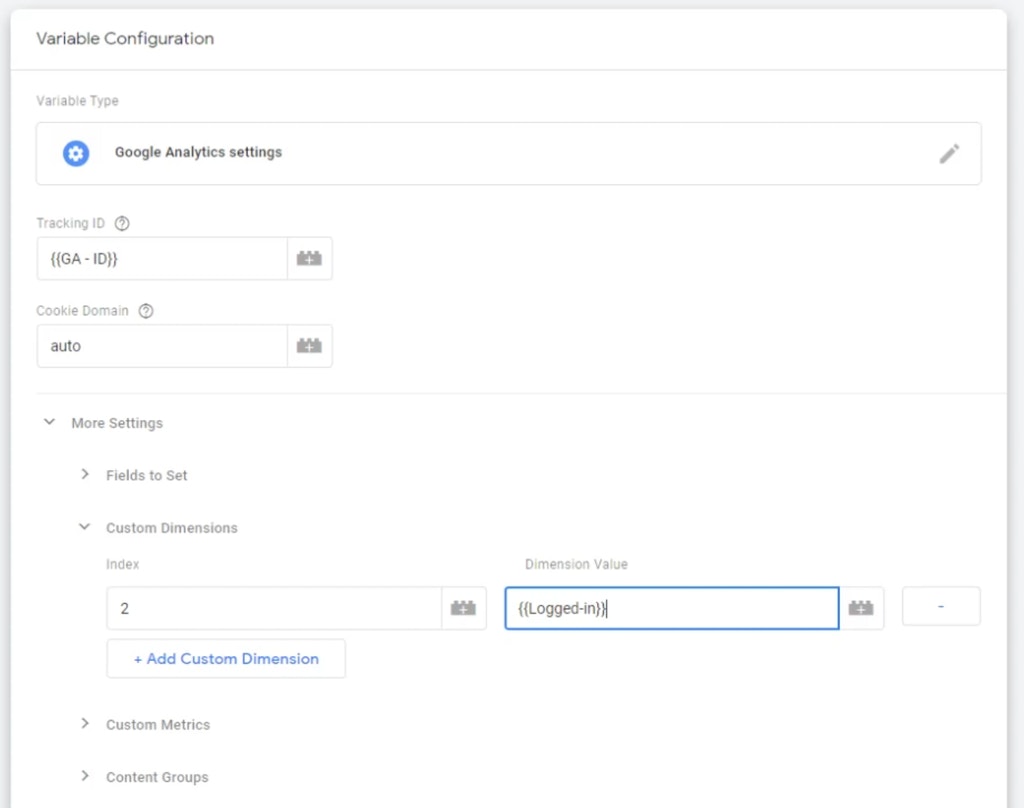
4. Edit your ‘Settings’ variable inside of Tag Manager and add a custom dimension referencing the variable created in step 1 and the Index ID noted in step 3.
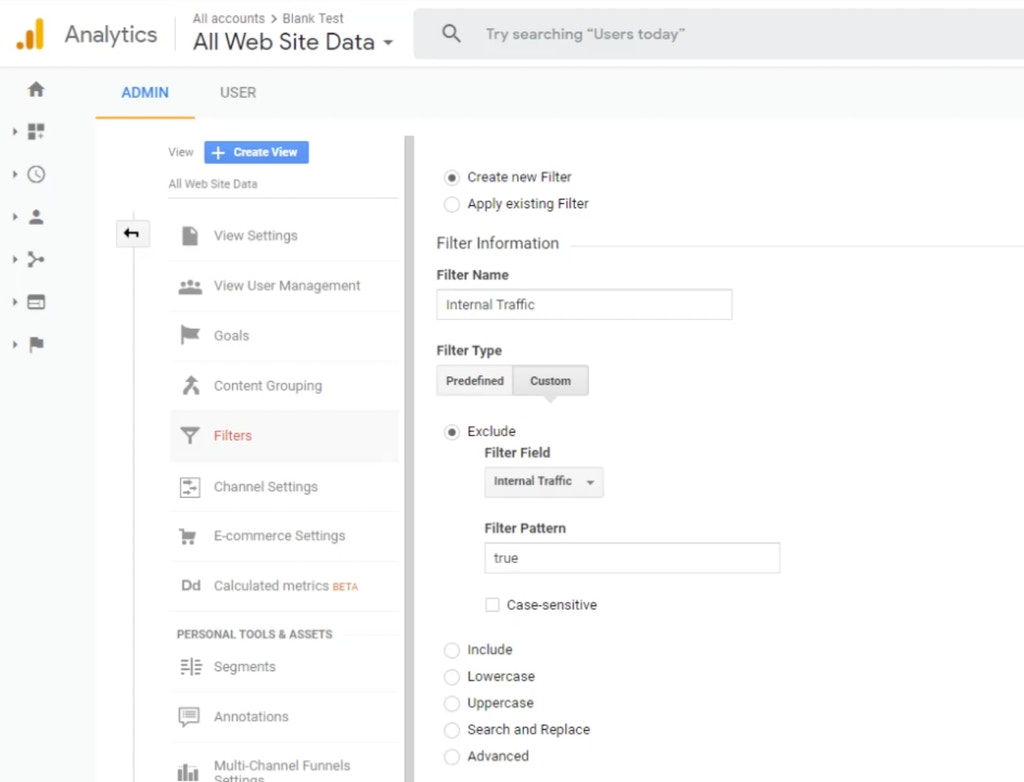
5. Create a new custom filter in the Analytics view you would like to exclude internal traffic from. This filter should use the settings shown below…
and that’s it! If you are using the WordPress variant, any users who log in will be will have their current and all following sessions excluded from your reports. If you are using the second variant, simply send all internal users a link to your website containing a query string called ‘internal’ that equals ‘true’, for example… website.com/?internal=true.
If you would like to stop people from being excluded, simply change this value to anything other than ‘true’, for example website.com/?internal=foobar.
WordPress Implementation video
This video covers the WordPress implementation. Simply change the variable explained in step 1.A to the URL Query variable explained in step 1.B.
Bonus tip!
If you use WordPress and have utilised version 1 of this implementation, you can enhance this setup by combining it with version 2. This will allow you to also exclude users who don’t log in or stop people from being filtered.
To combine both methods first create the variable documented in step 1.B and take note of the variable name.
Then create the custom JavaScript variable documented in step 1.A, however, this time tick the option ‘Convert undefined to…‘ and set this to the variable created in step 1.B.
This will first check if the user is logged-in, and if not, use the value set by the ‘internal’ query string, combining the methods!


