
This post will teach you how to use dynamic ads to create demand for your product catalogue across Facebook, Instagram and the Audience Network. This ad format allows you to showcase pieces from your inventory to relevant users, resulting in increased sales. The 6 steps below outline how you can set this up.
Bear in mind that before you start, you’ll need to:
- Upload your product catalogue to Business Manager (find out how to do this here)
- Ensure the Facebook Pixel is implemented correctly (find out how to do this here)
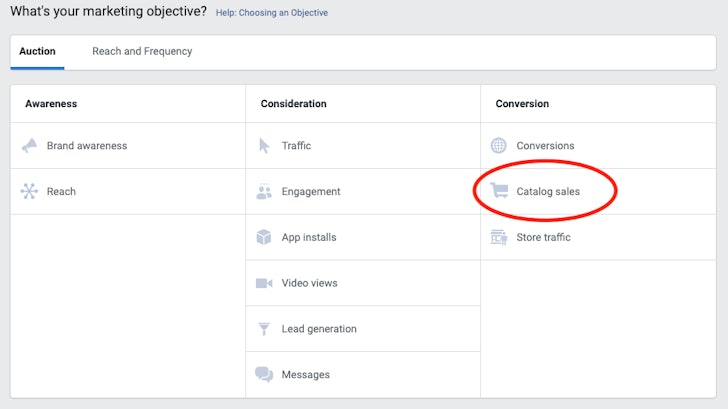
Step 1: Campaign creation
Create a new campaign and select the Catalogue Sales objective:
We recommend opting into campaign budget optimisation too – it’s set to become compulsory soon anyway. You’ll then be able to specify your daily or lifetime budget – depending on your requirements.
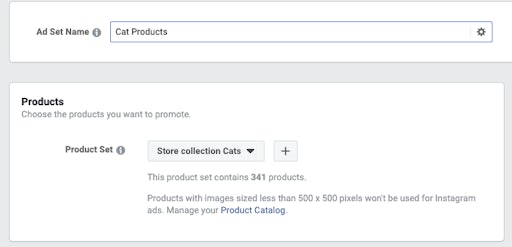
Step 2: Ad set set-up
Create your first ad set and choose the type of product you want to advertise. Facebook recommends using a set which contains a minimum of 1,000 products.
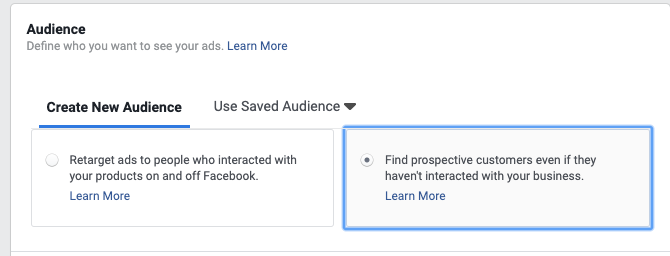
Step 3: Define your audience
At this stage you’ll want to select the second option: Find prospective customers even if they haven’t interacted with your business. (If you’re looking to set up dynamic retargeting for previous website visitors, you’d select the former, but for the purposes of this post we’re focussing on reaching new customers.)
At this point, you can refine your targeting with additional audiences, although Facebook recommends NOT using interest/connections/lookalike targeting and keeping the audience as broad as possible.
It’s also advisable to exclude past converters (Facebook suggests excluding converters from the past 10 days), as you don’t want to annoy users who have purchased your product recently. You can also exclude customers who are already in your database using custom audiences.
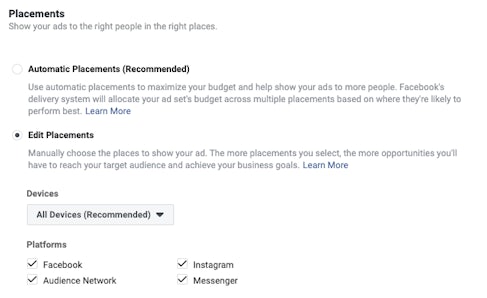
Step 4: Select Automatic Placements
Or at least two ad placements. Placements refer to the places on Facebook/Instagram/the Audience Network where your ad is eligible to show, e.g the Facebook Feed or Instagram Stories. Facebook recommends that you opt into Automatic Placements (meaning that your ad is eligible to show in all available placements), but if you’d rather not do this, you can select each placement individually (but we’d still recommend using at least two).
Step 5: Optimise for conversion events
Next, if you’re looking to drive sales, Facebook recommends optimising for Conversion Events. If you’re looking to drive traffic to your website, or just get your brand in front of more users, then you could also consider optimising towards Link Clicks or Impressions.
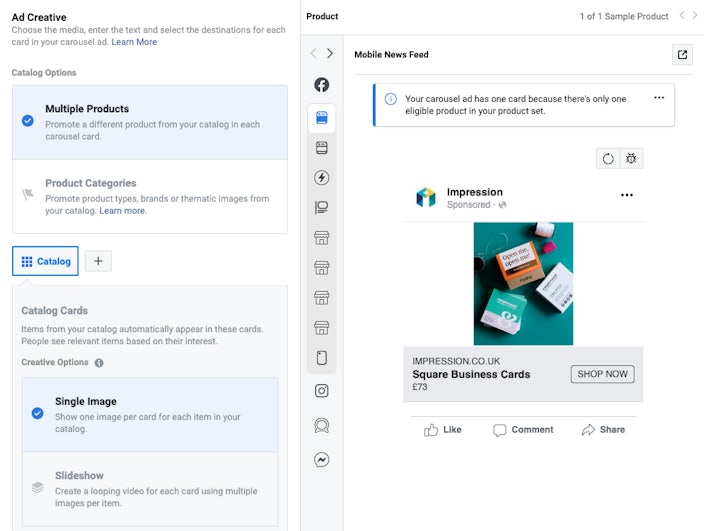
Step 6: Create your ads
You can then go on to customise your ad, choosing whether to promote multiple products or particular product categories from your catalogue. You can also customise your headline, newsfeed link description, and of course write your ad copy and choose a call-to-action. In this instance, your ad copy should be relevant and enticing to a new customer – perhaps offering them free shipping or a percentage discount as an incentive to shop!
And don’t forget to ensure that pixel tracking is turned on, you won’t be able to measure campaign performance otherwise!
Once the campaign is live, review performance each week and make adjustments to bids, ad copy and other campaign elements to optimise towards the best performance.
Alternatively, if you’re looking for an award-winning agency to take your paid social strategy to the next level – get in touch with us here.


