
Implementing cross-domain iframe tracking is a pain that many analytics and digital media professionals go through at least once in their careers.
The truth is, it’s ugly and should be avoided at all costs. But sometimes, for things like third-party booking platforms, website owners can integrate the service to get a popup booking application on their website with one line of code. This is pretty commonplace for restaurants and hotel booking widgets.
There are a few reasons this isn’t always tackled head-on. The first is that typically these platforms didn’t include ways to inject tracking codes as the platforms were mostly locked down. The second is that the JavaScript code required to implement looks scary for internet marketers who can’t usually code. The browser API needed for this (postMessage) to work has actually been around for way over a decade, so there’s no excuse!
NOTE: For this to work, you will need access to either edit the iframe source, be able to add in a Google Tag Manager container, or at the very least to provide JavaScript snippets for goals and events.
Can’t we just use Google Analytics?
If you do have access to trigger a JavaScript event on a successful form completion within a iframe popup widget, you should resist the temptation to directly insert Google Analytics (or another web analytics platform) as this data will actually be captured in a different session, and therefore have no context to the source (or medium, campaign, term, etc) which created this traffic in the first place.
When an iframe form is embedded into a page, we’re actually interested in firing any tracking events to the ad and analytics networks via the parent page, as this has all of the contextual information we need in order to fire events and goals which attribute to your marketing efforts.
How does this work?
When an iframe is embedded into a web page, it is effectively a locked down window into another separate URL that is usually on a different domain. Scripts from the parent page cannot impact what happens inside the iframe for security reasons, and in Google Analytics, embedded pages typically show as direct traffic because the Client ID is not passed between the pages/sessions.
NOTE: You could start investigating the Google Analytics Linker plugin for iframes to pass the Client ID from parent to child, but it’s almost not worth the effort when compared with this solution!
However, thankfully, the child iframe can communicate upwards to any parent frames/pages, which we can leverage to send notifications when events are completed, such as form fills, button clicks and purchases. If the child iframe page let’s the parent page (with GA running) know, then we can pass those event details straight on to your advertising platforms to register a goal completion for the recorded source/medium.
Three are two steps required to making this solution work in Tag Manager;
- Adding a listener to the page on your website so that if an event fires, you can deal with it, and
- Firing the event from the iframe in a specific format so that it filters up to the parent page to interact with your listener.
From these steps, you then have the ability to send Data Layer events to directly or indirectly trigger events in your advertising and analytics platforms.
Implementing the solution with Google Tag Manager
Step 1:
Either in a separate Tag Manager account, or by asking your iframe developers to implement code directly, insert the following code to be fired upon a successful trigger — for example, making a booking. Customise your domain name and if you want, the event payload too.
As you can see in my example below, we’re passing two variables; ‘event’ and ‘form’. If you or your iframe content developer want to pass messages to any domain in which it is embedded (be careful about sensitive content!) then just use an “*” asterisk symbol in quotes, rather than domain.
Step 2:
Next, set up your listener on all valid pages on your domain that you expect to receive the events from. I set this up through Tag Manager, as we roll this out to all client sites to enable tracking like this, however you can add this code to your website’s code if you would like to.
I set this to trigger on every page, but if you know an iframe will only ever be present on a subset of pages, then for efficiency, it’s best to set up an appropriate trigger in Tag Manager.
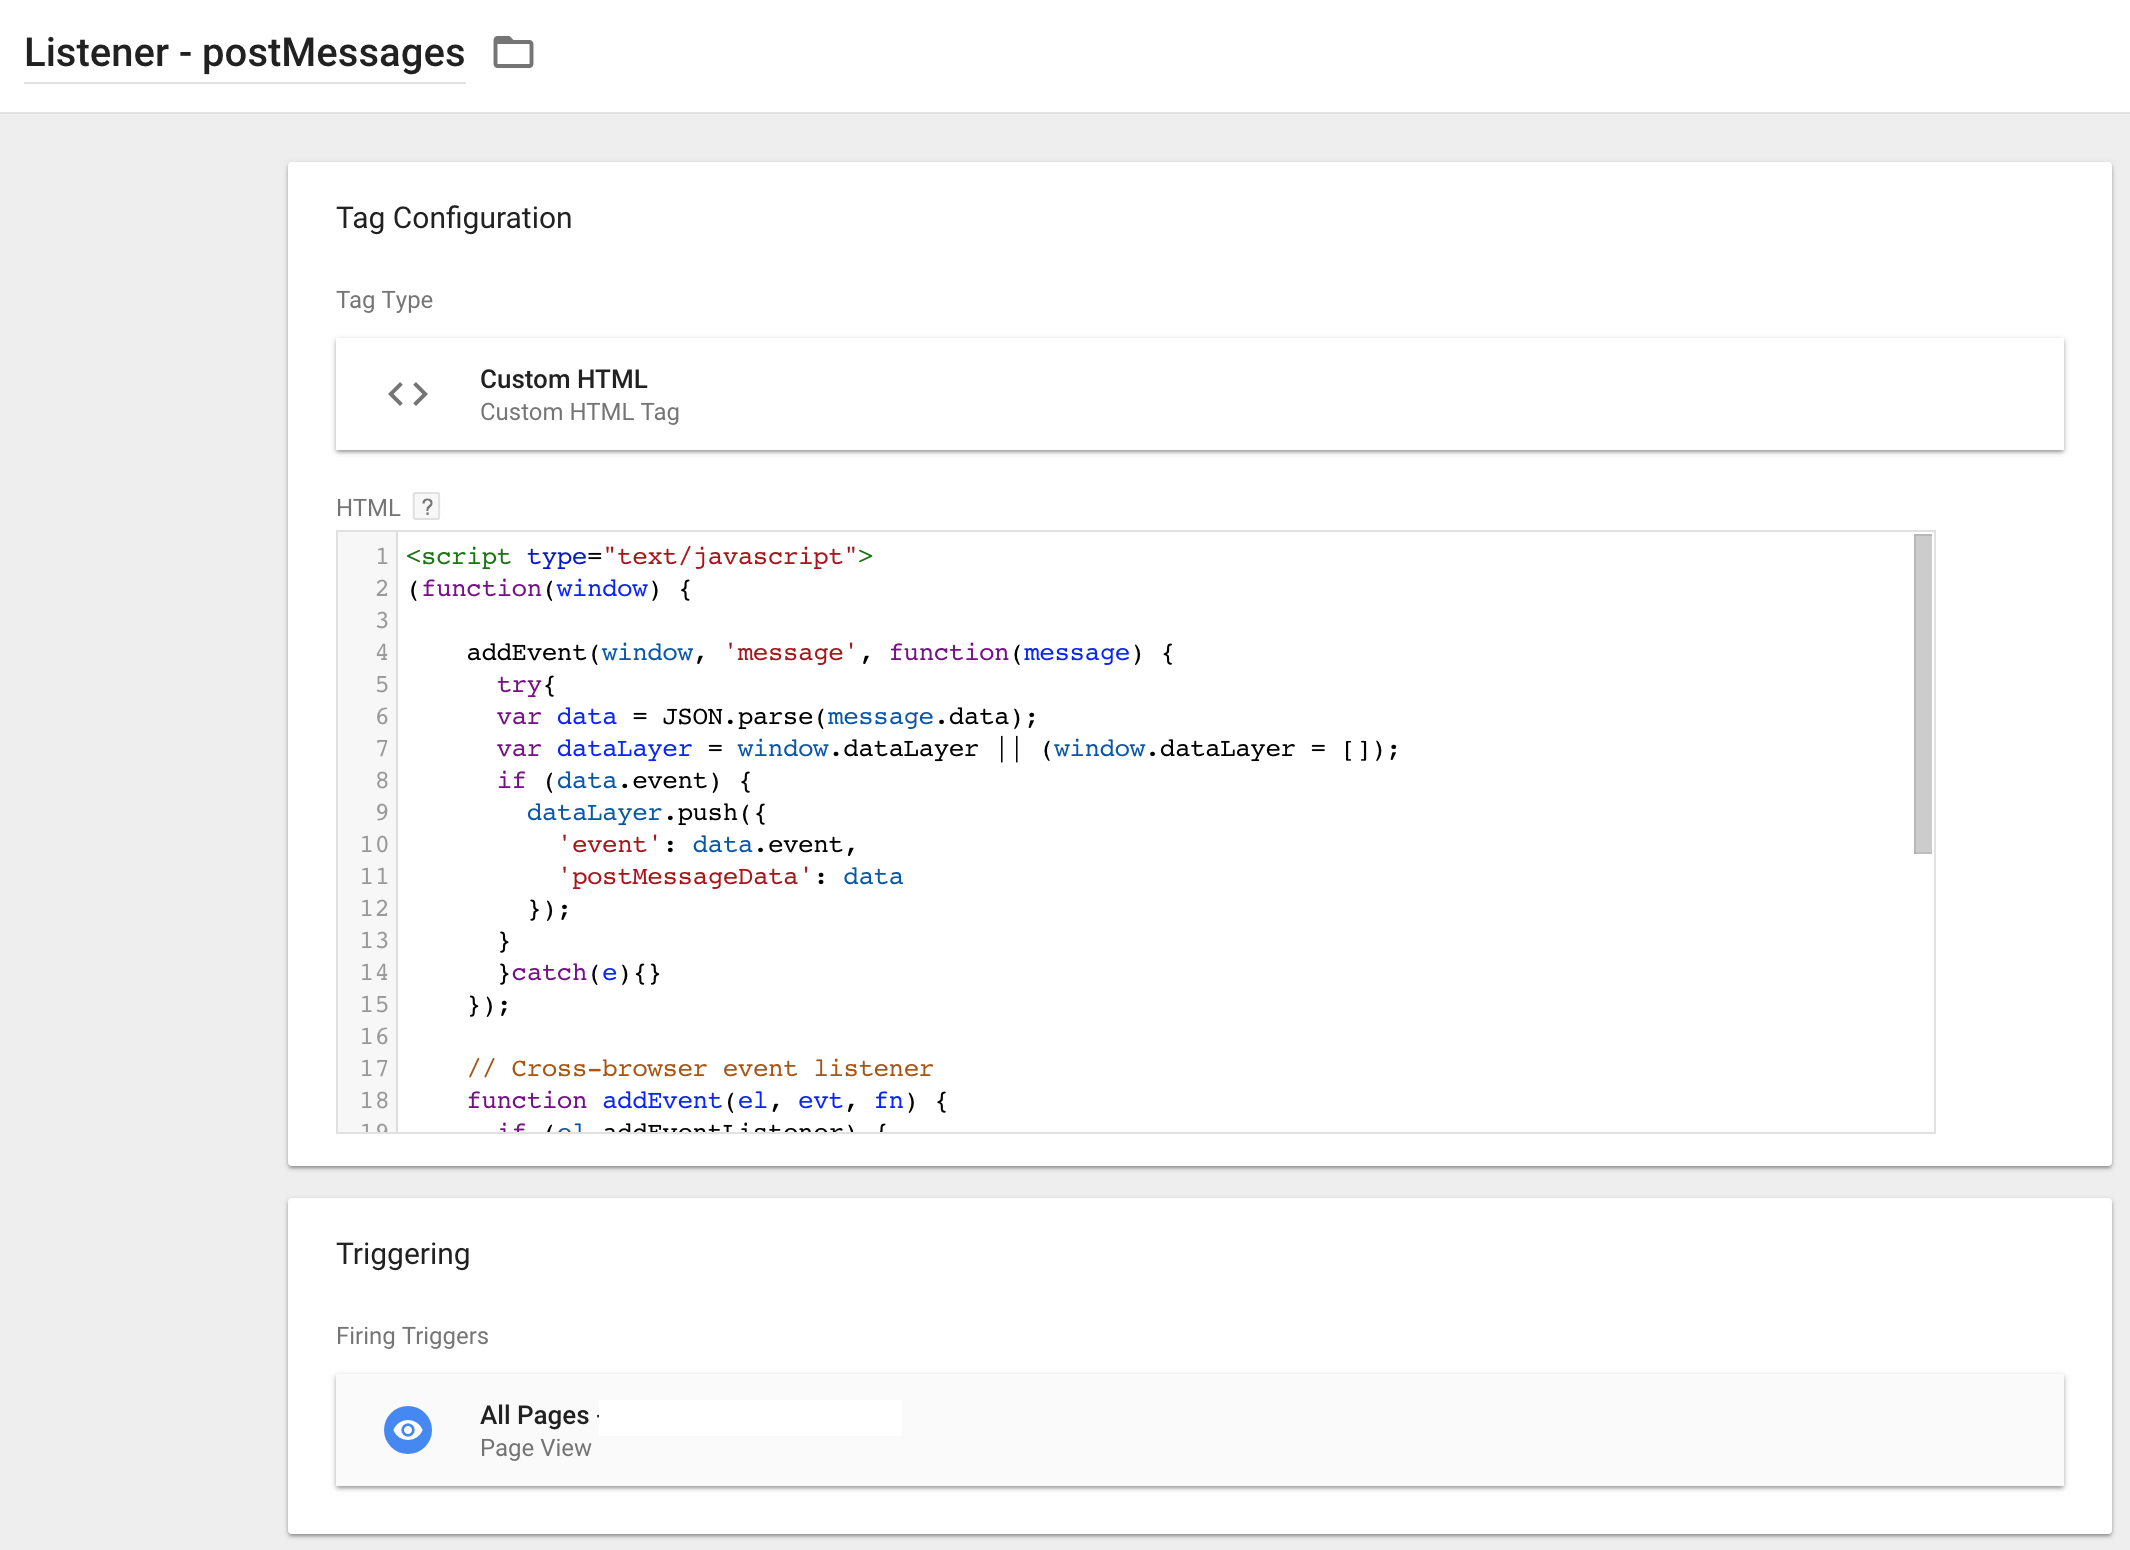
Step 3:
Now, as you may be able to read, on lines 9-12 above, there is a dataLayer.push() event defined, where the event name is taken from the original iframe window’s event. This event name is now accessible inside Tag Manager as a custom event, so that you can set up your GTM tagging as you see fit.
There is additional information we fire here into the Data Layer under postMessageData, but for the sake of simplicity, this is beyond the scope of this tutorial. Use this to differentiate different form names which you send between the frames as set in my example.
Step 4:
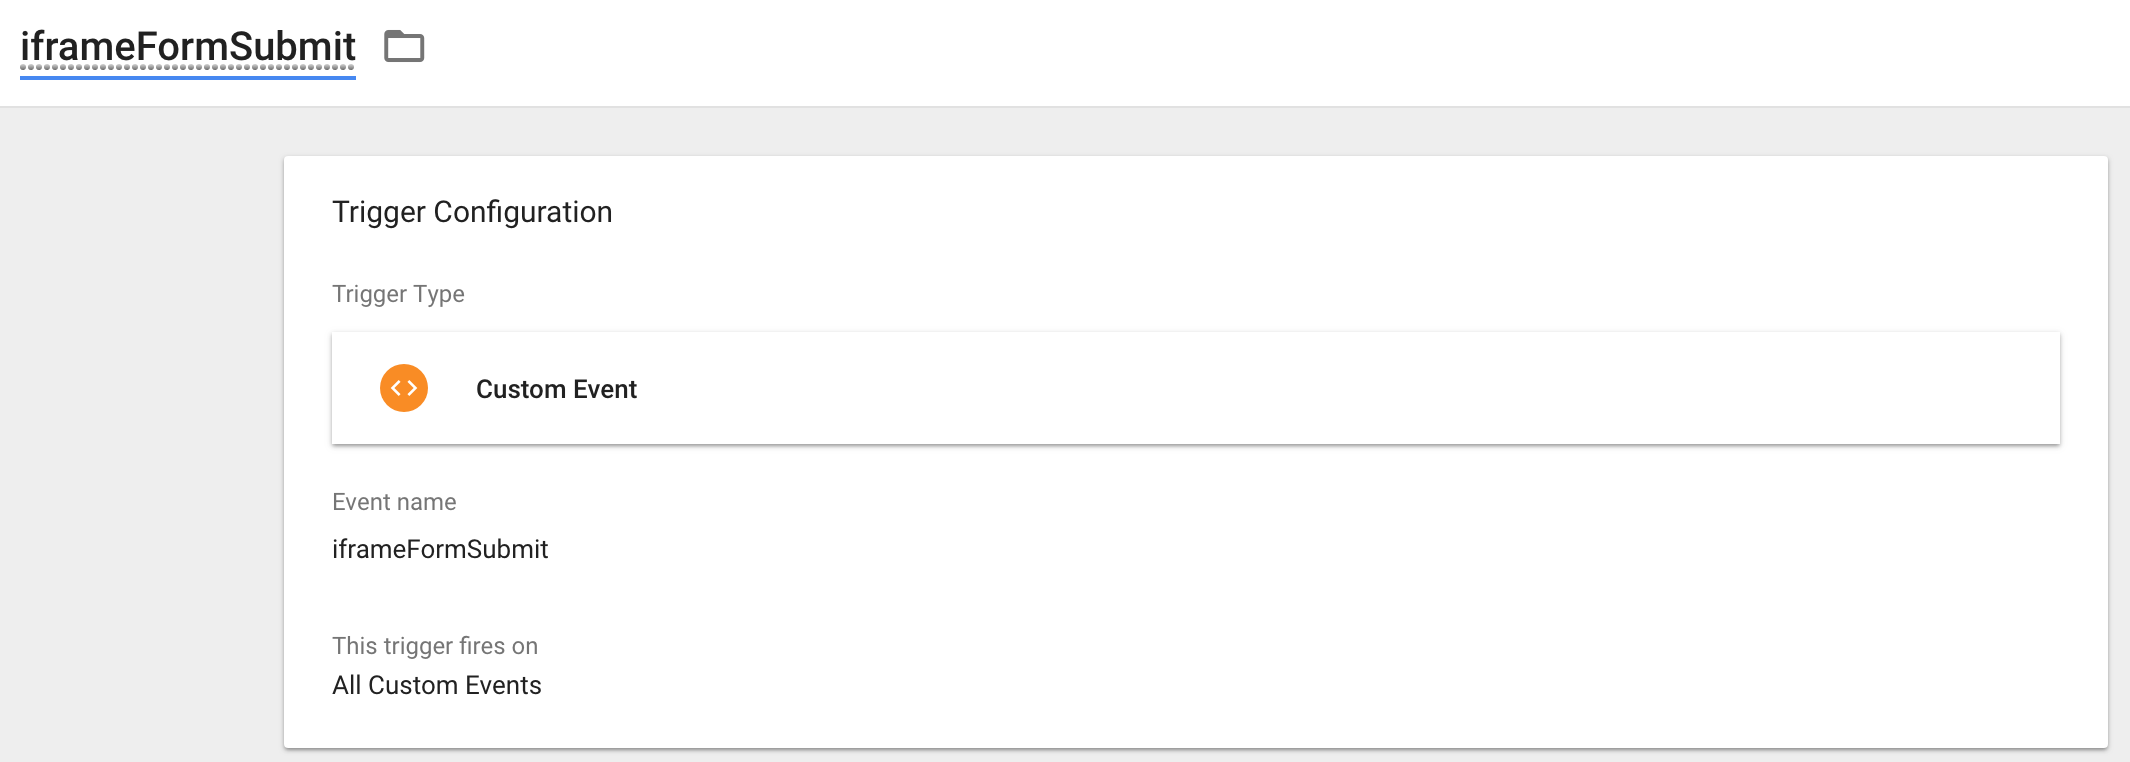
Configure a custom GTM trigger of type “custom event” which listens for your original event name. Mine was: “iframeFormSubmit”.
Step 5:
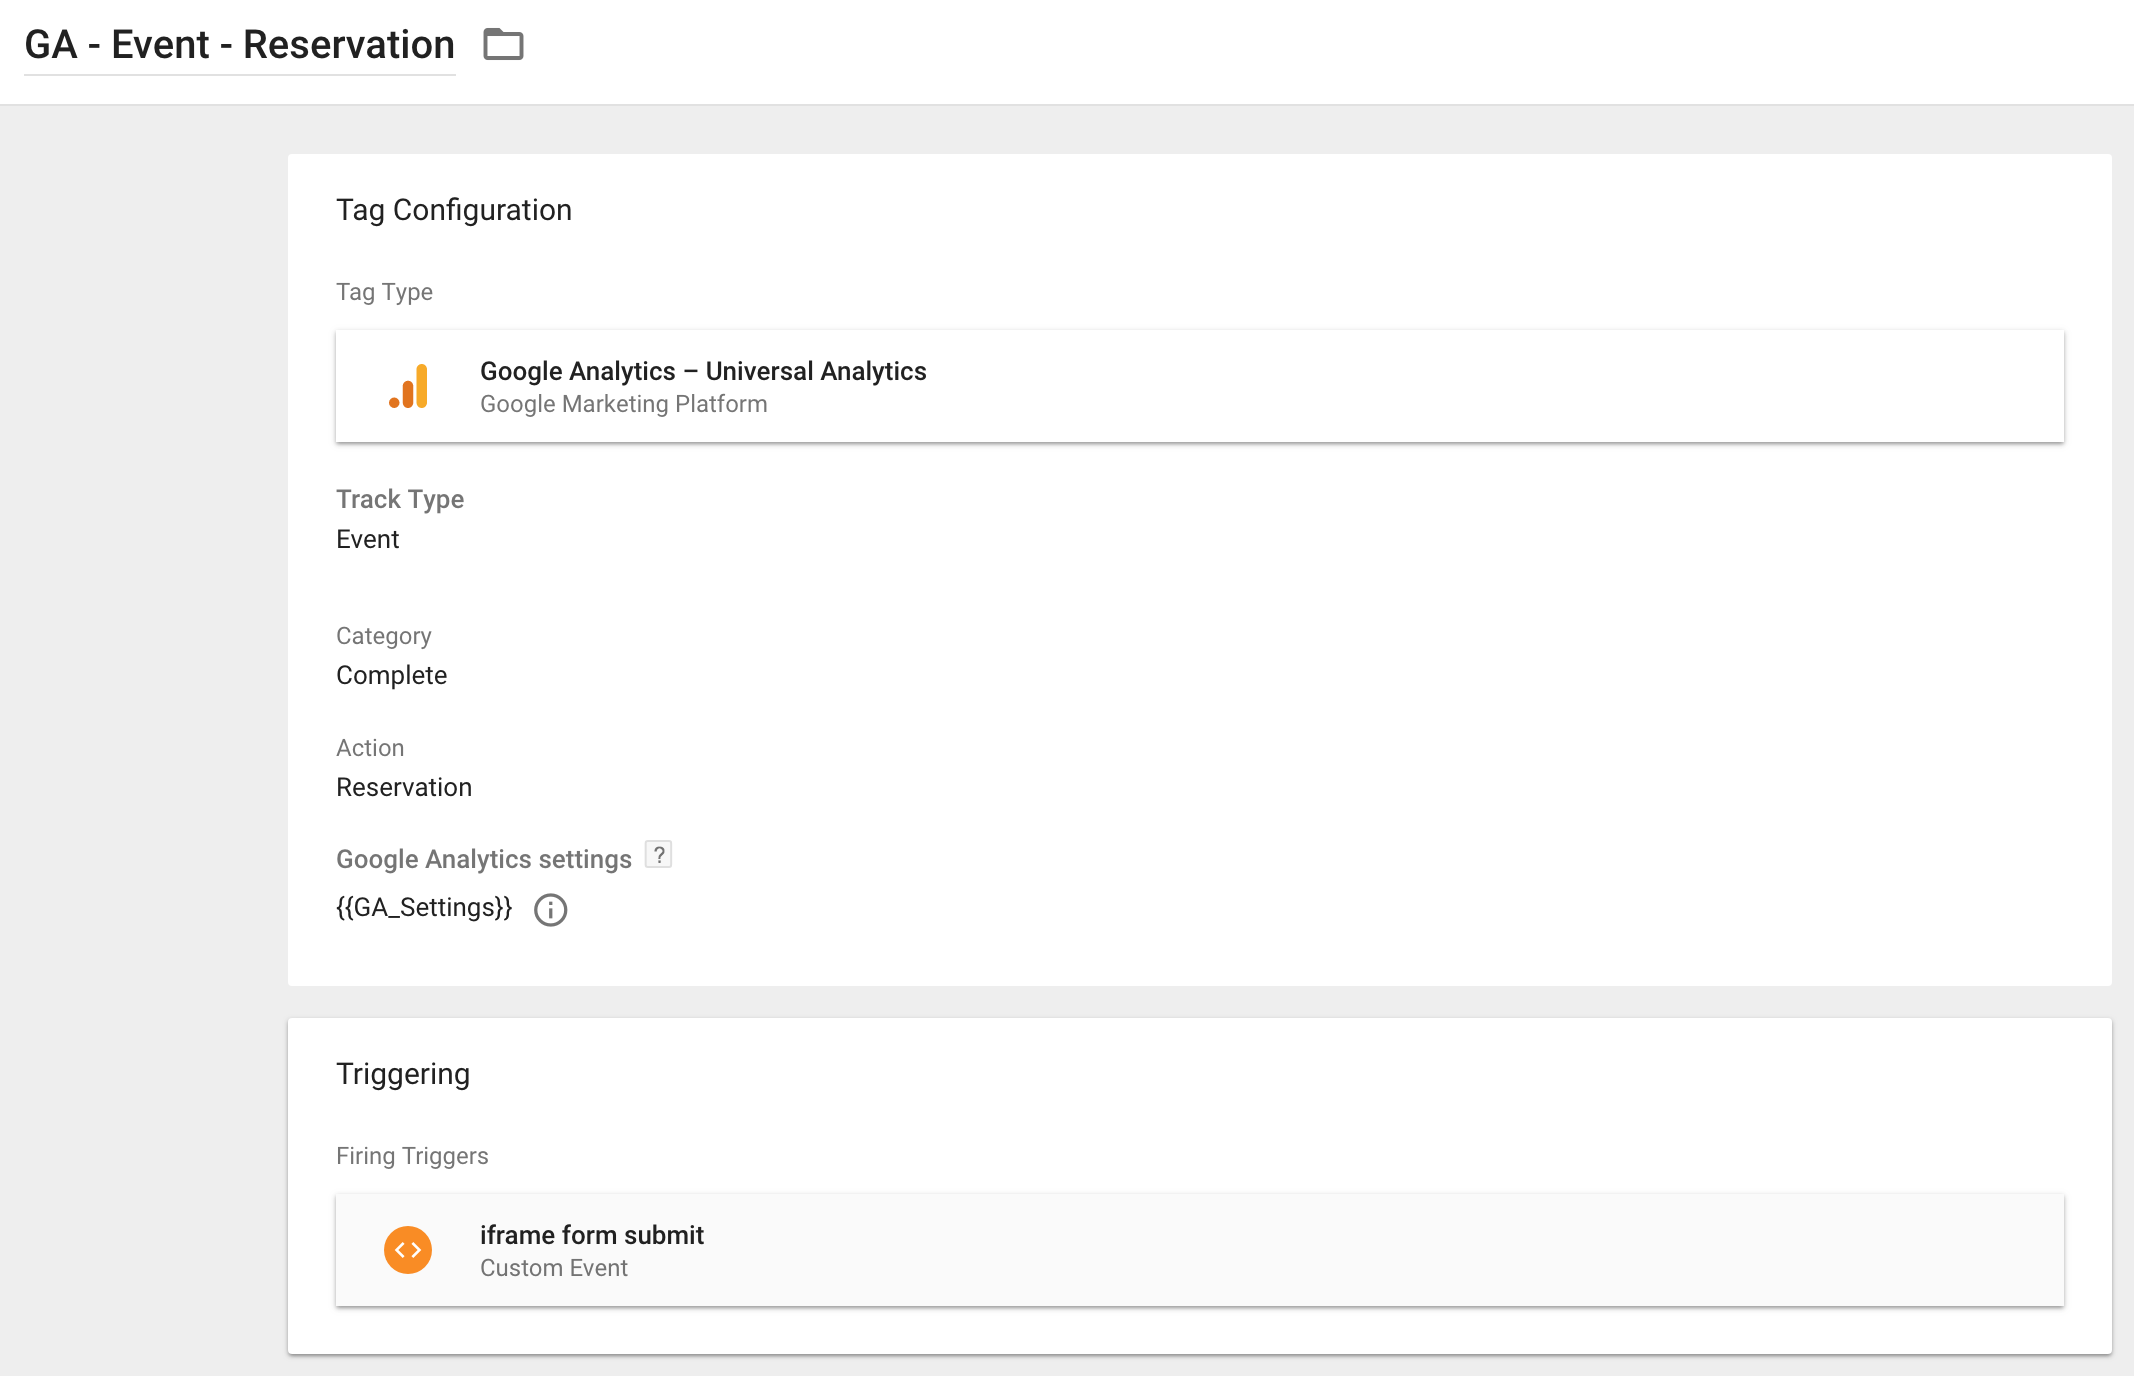
Next, set up your tag in Tag Manager and assign this new custom trigger as the tag’s trigger.
It’s time to test
At this time, it’s probably a good idea to start testing your implementation. Put your Tag Manager account into preview mode and begin testing, ensuring you also have your Chrome Tag Assistant plugin recording Google Tag Manager and Google Analytics events, too.
Learn more about Analytics and Measurement in our dedicated blog section, or discover our advanced audit guides and more in our resources.


