
With Christmas fast approaching we wanted to treat our readers to an early stocking filler for businesses. This blog provides guidance with setting special hours in your Google My Business account plus other useful tips to help you prepare for the festive season.
Whatever industry your business is in, whether service-based and closing down over the holidays for a well-earned break or an ecommerce business anticipating peak season, there are certain actions you can be doing to be better prepared and ensure your customers are well informed.
1. Set Special Hours to your Google My Business for Christmas
In order for your Christmas and New Year opening hours to be displayed in the SERPS or more specifically the knowledge graph for your business, these must be set in Google My Business (GMB).
This will provide convenient, accurate information for your customers and indicate when they can expect to hear back from you over the holidays – here’s how you do it:
Log in to your GMB account and select the relevant businesses / location that you want to set special hours for. Head to ‘info’ and scroll down to the ‘Add special hours’ option. This should then display the below window:
To show additional limited opening hours to those specified in the above image, there is an ‘‘add new date’ option at the bottom of this window.
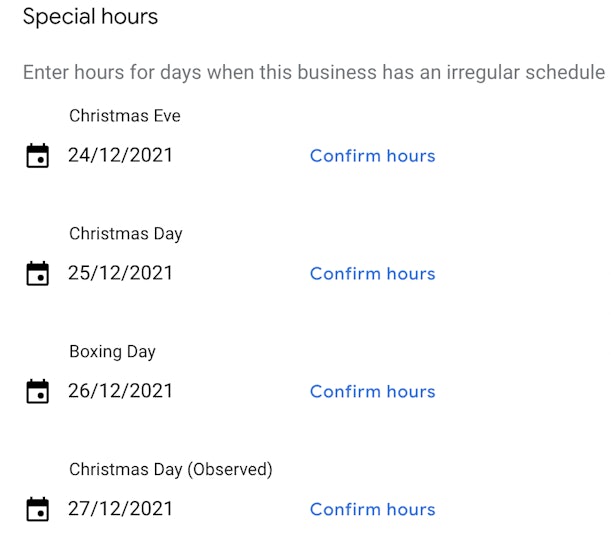
If you are open 24 hours, enter 12:00am–12:00am.
Click “Add another” to add more special hours for the location.
These changes can take up to 3 days to be visible so make them with plenty of time before the end of December so your customers have good visibility of them.
Again, providing clear and accurate information to your customers over the Christmas period will help to retain trust and confidence in your business while avoiding any potential upset. Make sure that you check your opening hours are all correct after the holiday period too.
2. Reiterate Christmas opening hours on your website and social channel
Where possible, in addition to GMB, it’s best practise to display Christmas opening hours on your website. Adding something to your homepage or the contact/about us page where your hours are normally shown is the most sensible solution.
You could also use the ‘pinned post’ function on your company’s Twitter and Facebook page as a way of letting your customers know your hours will be different than usual. Pinned posts are great to use for any information that you want to stand out, as they allow a specific tweet or Facebook status to be permanently pinned at the top of the profile page and therefore visible straight away to anyone that is visiting your profile.
3. Keep your brand active over Christmas – even if you aren’t
Scheduling content and social posts is a great way to keep your business visible even if you’ve effectively shut down for the holidays. We recommend that you plan an editorial calendar for the dates that your business is closed or with limited staff over the season and create the posts and content beforehand.
Why not schedule a “Merry Christmas from all of us here at [company]!” message for December 25th?
If you don’t currently have a platform that allows you to schedule your social media activity, there are plenty of tools that can help, such as Hootsuite, Buffer or ContentCal. Scheduling tools allow you to write a post, select which channel(s) you want to share your message through and choose the exact time and date they go live.
What’s particularly useful about them is that they integrate with various popular social media platforms, such as Facebook, Twitter, LinkedIn and Instagram. This means you can write one post and schedule it for all social channels, making sure your message is consistent and saving you time!
If you’d prefer to solely use Facebook, it also allows for scheduling of a post for pages:
- Simply write your post at the top of your Page’s timeline
- Click next to Publish and select Schedule
- Select the date and time when you want the post to publish and click Schedule


